| Installation | ||
|---|---|---|
| Previous | Next | |
| Introduction | Quickstart Tutorial | |
This chapter contains instructions on how Music Processing Suite (MPS) and optional additional applications are installed.
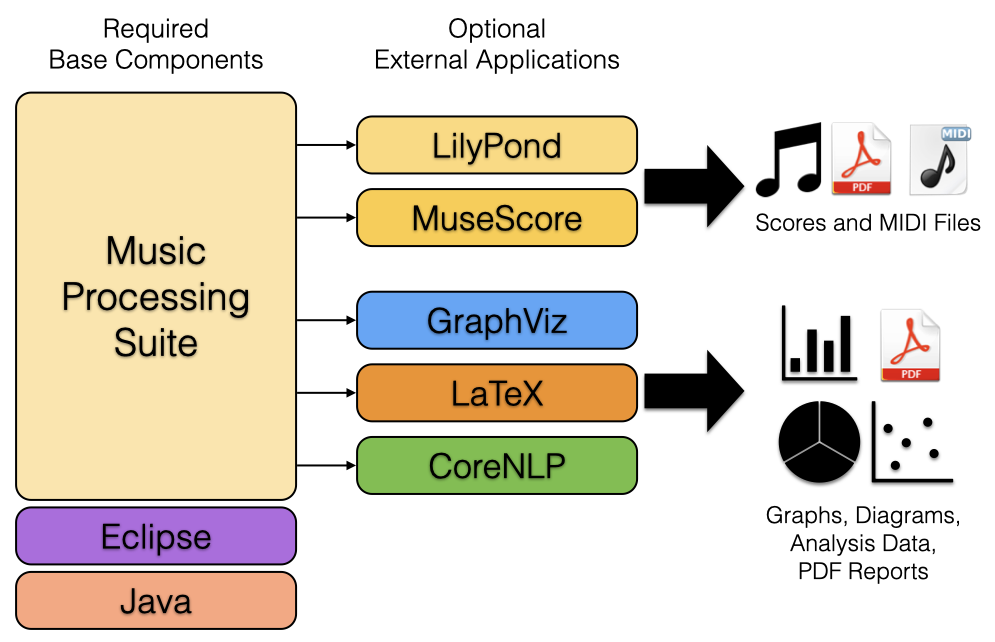
MPS runs on the Eclipse platform, which requires a Java runtime environment. In order to use basic features of MPS, only Java and the standalone MPS application (which includes Eclipse) are required. Depending on your applications and use cases, additional external applications can be utilized by MPS for enhanced results and additional output formats.
Music Processing Suite runs on Windows, Linux and Mac OS X. To run MPS, a Java Runtime Environment (JRE) or Java Development Kit (JDK) is required in version 11 or higher.
MPS runs out-of-the-box with the versions Java 11 to Java 15 (inclusive). When using Java 16 or higher, an additional command line parameter is required. Refer to the Troubleshooting section for more details.
The following instructions help you to set up MPS as quickly as possible. Please refer to the detailed instructions below if any of the instructions are unclear.
Required software:
The following instructions are for Mac users only:
MPS.app to your Applications folder.sudo xattr -rd com.apple.quarantine /Applications/MPS.appMPS.app like every other Mac applicationDepending on what you want to do with MPS, you might consider installing the following additional applications:
Recommended Java distributions compatible with MPS can be downloaded from Azul. These are open source Java distributions which have less license restrictions than the Java packages provided by Oracle. Download and install a JDK for your operating system. The minimum version is Java 11. The maximum recommended version is Java 15. For Java 16 or higher, an additional command line parameter is required. Refer to the Troubleshooting section for more details.
If you don’t know whether Java is already installed or which version is installed, open a terminal/command line on your operating system and enter
java -version
and hit enter. If java is installed, the first line of the output shows the Java version. For example, this is the first output line for a Java 15 JDK of the Zulu distribution:
openjdk version "15.0.1" 2020-10-20
Music Processing Suite can be installed as standalone software or into an existing Eclipse installation. If you install MPS for the first time or are not sure what to do, go for the standalone installation. If you are already familiar with Eclipse and have a recent version installed, you can consider installing MPS into your existing Eclipse instance.
Standalone versions of MPS can be downloaded at www.musicprocessing.net. Download the appropriate version for your operating system and processor architecture. Unpack the downloaded archive file and start MPS by starting the respective executable file (MPS.exe for Windows, MPS for Linux and MPS.app for Mac).
Important note for Mac users: If you have trouble running MPS on Mac because of security issues or OS X says the app is „damaged”, execute the following command in a terminal (to open a terminal, simply search for Terminal in spotlight) to unlock the MPS application:
sudo xattr -rd com.apple.quarantine /Applications/MPS.app
Refer to this post for more details.
Please skip this section if you already installed the standalone version in the previous step. If you already have a version of Eclipse installed, the MPS plugins can installed into your existing Eclipse installation. In your existing Eclipse instance, navigate to Help → Install New Software and enter the following update site URL:
https://updates.musicprocessing.net/
Select the Music Processing Suite Feature and click through the installation wizard. After the installation, Eclipse will be restarted and MPS will be ready to use.
The following software components are optional and are used for the following purposes:
Download LilyPond for your operating system from lilypond.org and install as described on the website.
To connect LilyPond to MPS, follow these steps:
lilypond executable, e.g. /Applications/LilyPond.app/Contents/Resources/bin/lilypond.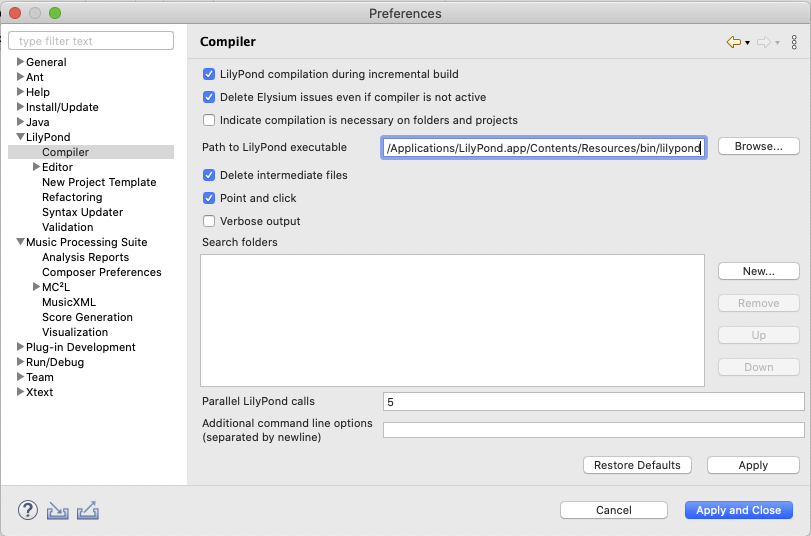
Download MuseScore for your operating system from musescore.org and install as described on the website.
MPS will automatically search for MuseScore in the following locations depending on your operating system:
| Operating System | Default Search Paths | Executable Names |
|---|---|---|
| Linux | /usr/local/bin/usr/bin | mscore3musescore3mscore |
| Mac OS X | /Applications/MuseScore 3.app/usr/local/bin/usr/bin | mscoremscore3musescore3 |
| Windows | C:\Program*\MuseScore* | MuseScore3.exe |
If MuseScore cannot be located automatically or if you have installed MuseScore elsewhere, the path can be configured as follows:
/Applications/MuseScore 3.app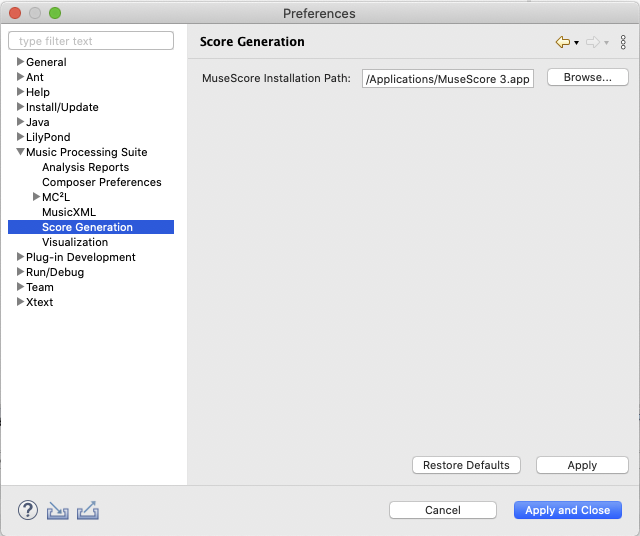
GraphViz is required if you want to visualize composition models in the form of context trees and/or display graph-based music analysis results.
The application can be downloaded from graphviz.org.
Optionally, install the program graphviz-gui if you require an additional viewer to display .dot files directly. You don’t need graphviz-gui if you are comfortable with displaying composition models using an PDF viewer.
Note for Mac users: native installation packages might not be available, but it is possible to install GraphViz via MacPorts or Homebrew. The following commands can be entered into a terminal to install Homebrew and GraphViz:
/bin/bash -c "$(curl -fsSL https://raw.githubusercontent.com/Homebrew/install/HEAD/install.sh)"
brew install graphviz
MPS will automatically search for GraphViz in the following locations depending on your operating system:
| Operating System | Default Search Paths | Executable Name |
|---|---|---|
| Linux | /usr/local/bin/usr/bin | dot |
| Mac OS X | /opt/local/bin/usr/local/bin/usr/bin | dot |
| Windows | C:\Program*\Graphviz*\bin | dot.exe |
If GraphViz cannot be located automatically or if you have installed GraphViz elsewhere, the path can be configured as follows:
dot executable, e.g. /opt/local/bin.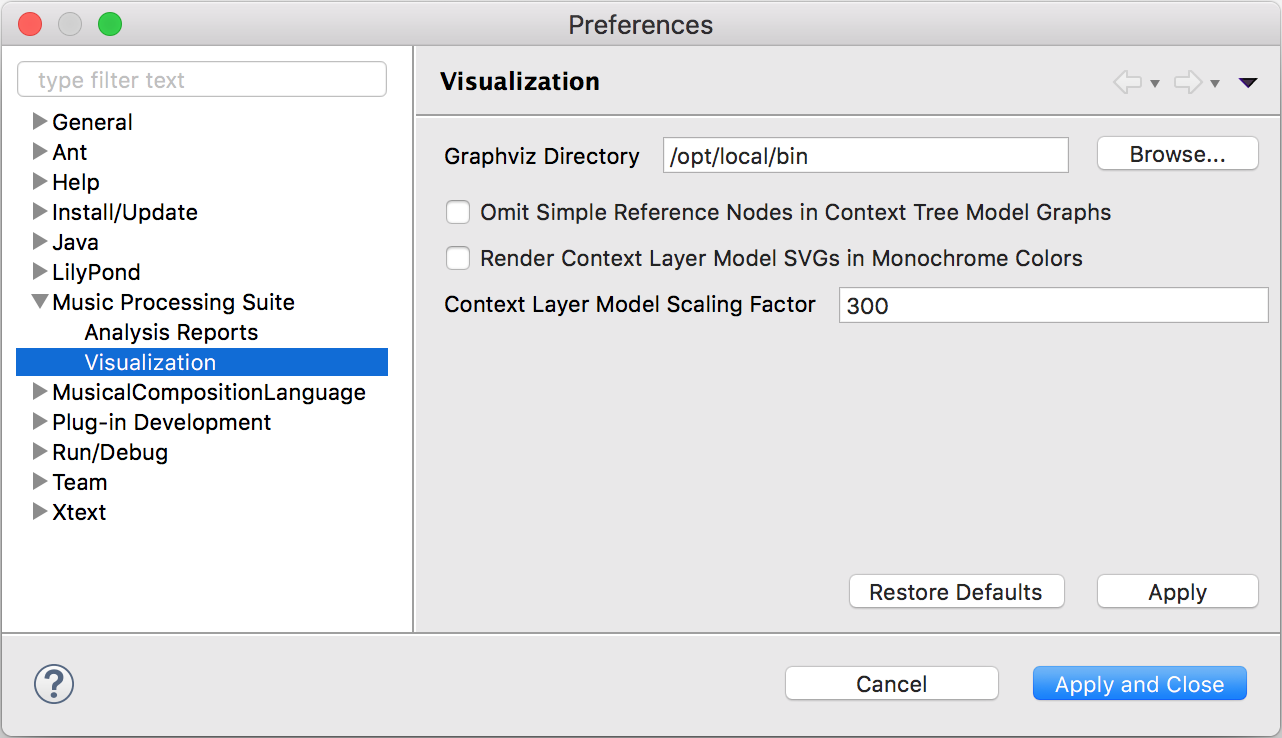
LaTeX is only required if you intend to analyze music with MPS and want to export statistical analysis results and graphs in the form of PDF reports. Visit latex-project.org to get a LaTeX distribution for your operating system. Refer to the following table for recommendations for your operating system.
| Operating System | Recommended Distribution | Remarks |
|---|---|---|
| Windows | MiKTeX | It is recommended to enable the feature to install missing packages on-the-fly. |
| Linux | TeX Live | Custom LaTeX packages might be available for your specific Linux distribution. |
| Mac OS X | BasicTeX | BasicTeX is a minimal and small TeX distribution (about 80 MB), compared to the full MacTeX distribution which is over 4 GB. |
Make sure that the following packages are installed in your LaTeX system using the TeX Live Utility. The following packages have to be installed manually when using a BasicTeX distribution on Mac OS X:
pgfplots
collcell
adjustbox
collectbox
When using BasicTeX on Mac OS X, download the TeX Live Utility here. Save it in your Applications folder and open it (if Mac OS X complains about security issues, right-click and open it or allow access in the security section of your system preferences). Possibly an update will be performed after the first start.
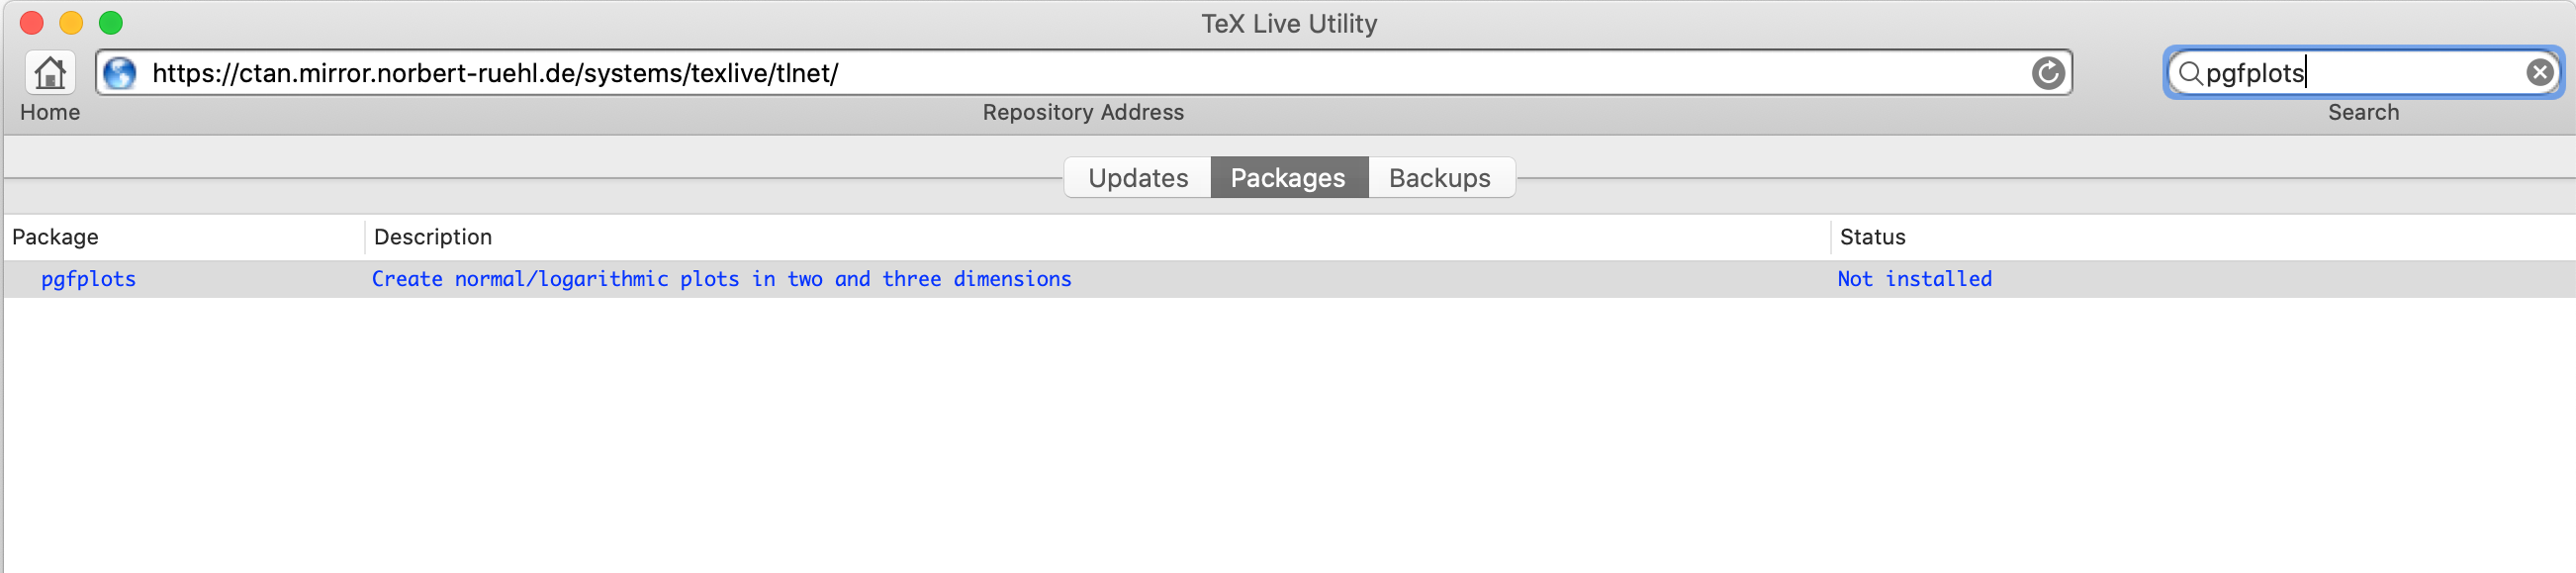
Once the tool is opened, switch to the Packages tab. Then enter packages to be installed in the search field on the top right. Right-click on the package and choose Install to perform the installation. Repeat this step for all packages listed above.
MPS will automatically search for LaTeX in the following locations depending on your operating system:
| Operating System | Default Search Paths | Executable Name |
|---|---|---|
| Linux | /usr/local/texlive/usr/share/texlive/usr/local/bin/usr/bin | lualatex |
| Mac OS X | /usr/local/texlive/usr/share/texlive/opt/local/bin/usr/local/bin/usr/bin | lualatex |
| Windows | C:\Program*\MiKTeX* | lualatex.exe |
If LaTeX cannot be located automatically or if you have installed LaTeX elsewhere, the path can be configured as follows:
/usr/local/texlive/2020basic/bin/x86_64-darwin.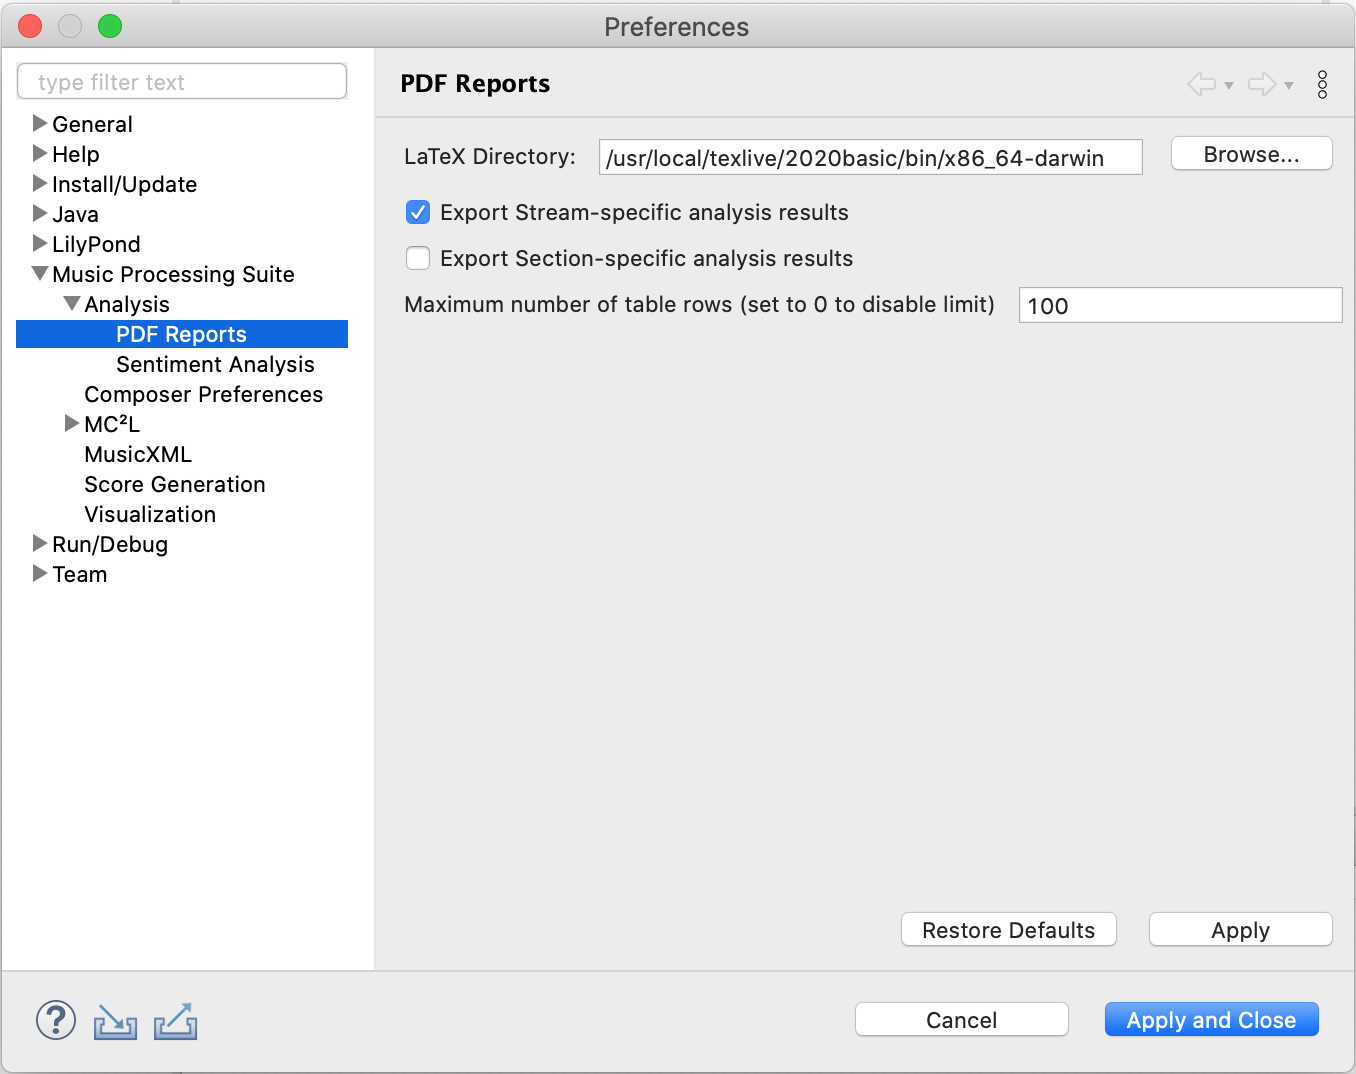
CoreNLP is an advanced natural language processing framework developed by the Stanford NLP group. If a CoreNLP server is installed and running, it can be utilized by MPS for the analysis of sentiment polarities in lyrics.
To install CoreNLP, download it from stanfordnlp.github.io and extract it to a directory of your choice.
MPS will automatically search for CoreNLP in the following locations depending on your operating system:
| Operating System | Default Search Paths | JAR File Name |
|---|---|---|
| Linux | /opt/stanford-corenlp-* | stanford-corenlp-*.jar |
| Mac OS X | /Applications/stanford-corenlp-* | stanford-corenlp-*.jar |
| Windows | C:\Program*\stanford-corenlp-* | stanford-corenlp-*.jar |
If LaTeX cannot be located automatically or if you have installed LaTeX elsewhere, the path can be configured as follows:
/Applications/stanford-corenlp-4.2.0.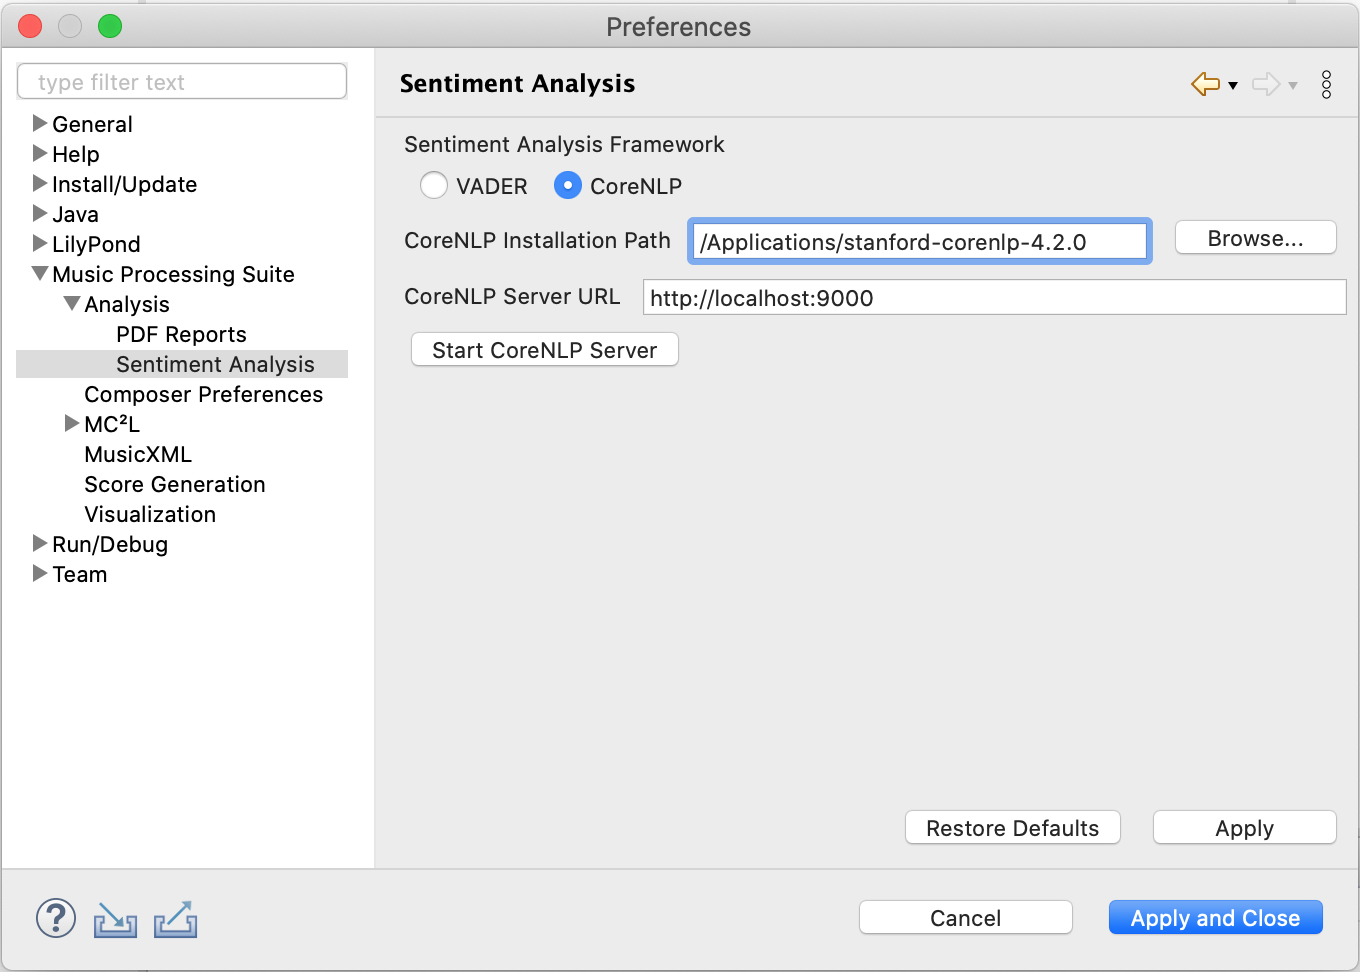
| Previous | Top | Next |
| Introduction | Quickstart Tutorial |