| Quickstart Tutorial | ||
|---|---|---|
| Previous | Next | |
| Installation | Context Layer Models | |
This chapter provides a quick tutorial to become acquainted with the most important features of MPS. Refer to the remaining chapters for more detailed descriptions and explanations.
Click the button ![]() to open a menu for creating new projects and files:
to open a menu for creating new projects and files:
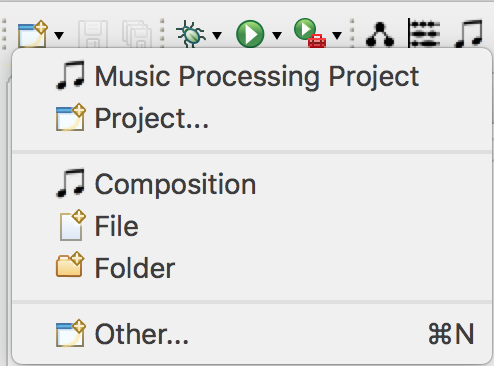
Choose Music Processing Project to create a new project configured for MPS and enter a name for your project. Click Finish to complete the project creation.
To create a new composition, right-click on a project or folder and choose New → Composition.
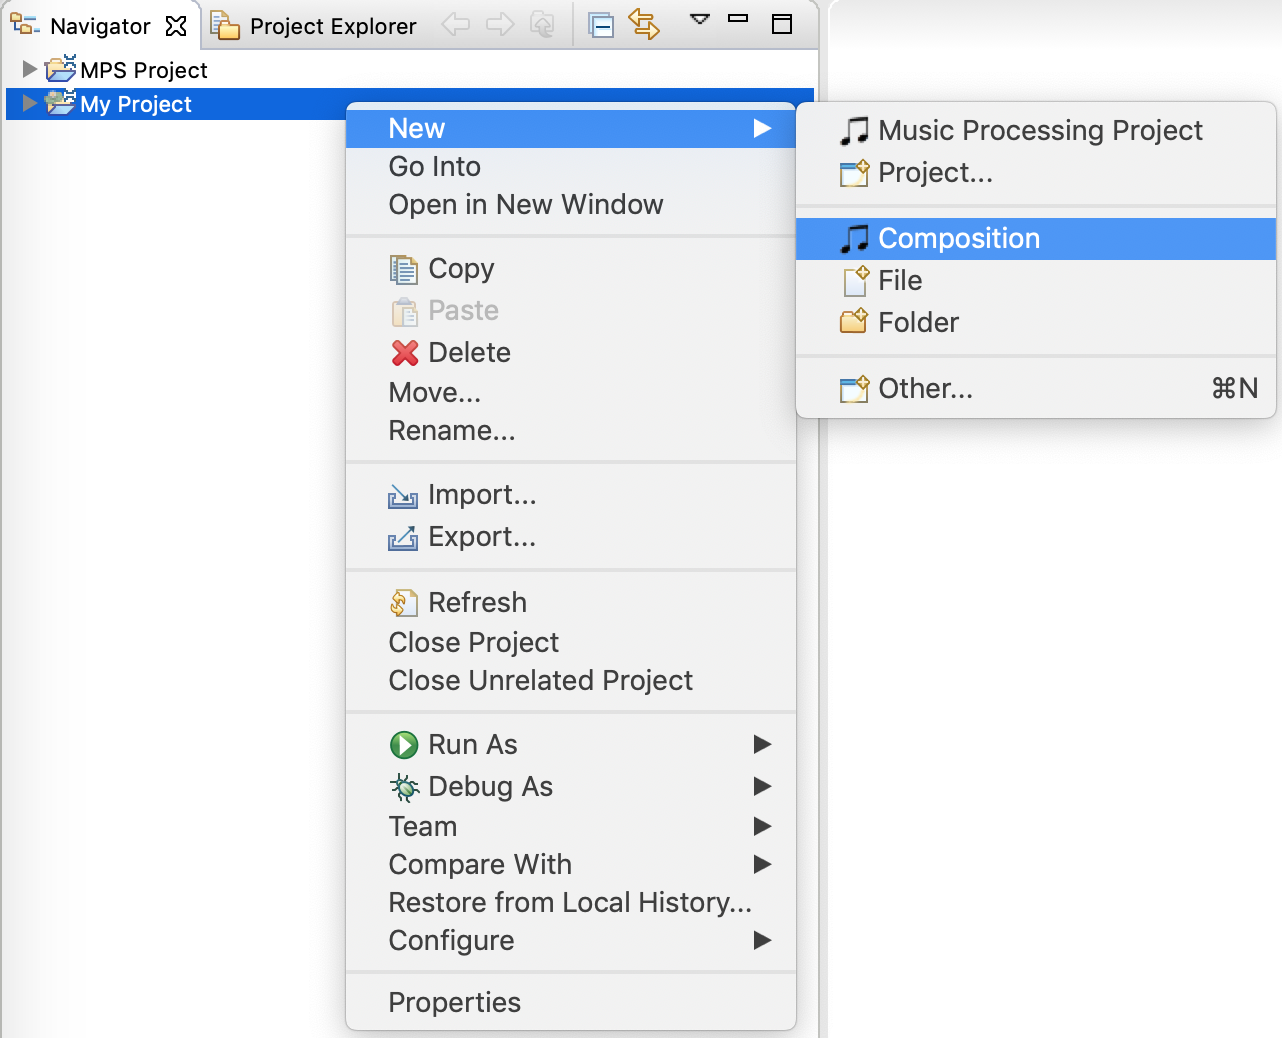
Alternatively, the menu introduced in the previous section can be used, which can be accessed using the button ![]() . The following wizard is opened:
. The following wizard is opened:
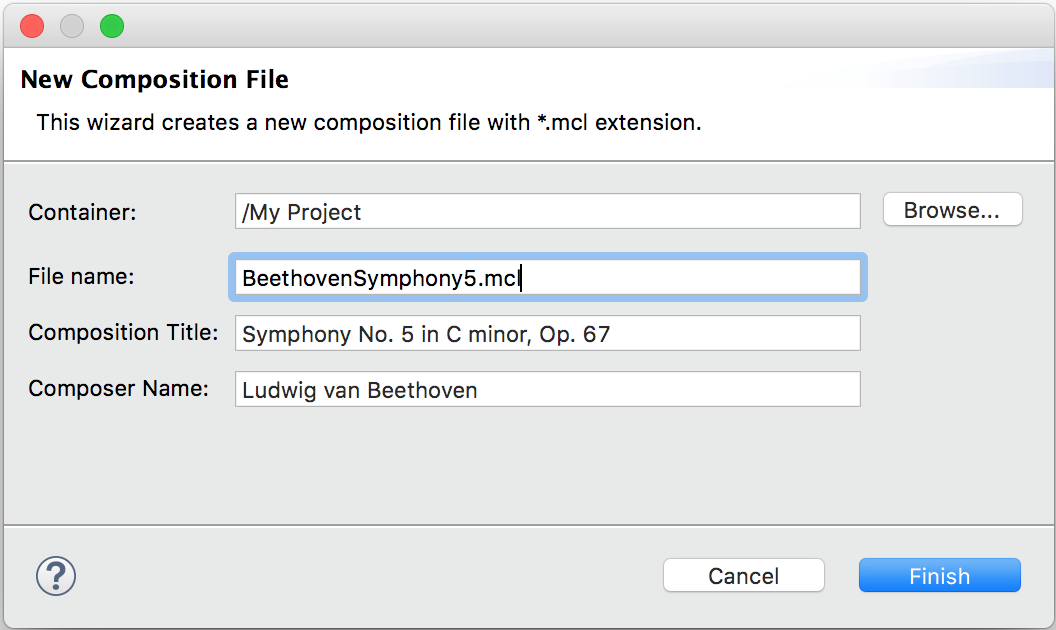
Enter the file name and optionally provide a title and the composer name. Click Finish to create your first composition. The composition editor will open in the center of the application, containing the specified metadata and an empty composition tree. Add the following code to add some musical content:
composition
{
    time 2/4, key Cm
    {
        rhythm _8 8 8 8 2
        {
            pitches 4 4 4 2
            pitches 3 3 3 1, rhythmicExtension 2
        }
    }
}
To view a graphical representation of the composition model, click the button ![]() to render a tree graph using GraphViz. Note that GraphViz must be installed in configured to use this feature as described in the Installation chapter. The following graph results:
to render a tree graph using GraphViz. Note that GraphViz must be installed in configured to use this feature as described in the Installation chapter. The following graph results:

For a time-based representation of the resulting musical context layers, so called context layer models can be generated. Click on the button ![]() to create an SVG file containing the layer model. The file will be opened with the default application registered in your operating system to open scalable vector graphics files, e.g. a web browser. The corresponding context layer model looks like this:
to create an SVG file containing the layer model. The file will be opened with the default application registered in your operating system to open scalable vector graphics files, e.g. a web browser. The corresponding context layer model looks like this:

To create a score representation of a composition, click the button ![]() in the toolbar. If the score is created for the first time, a dialog with score generation options will be shown. After configuring the score options, click Apply and then Run.
in the toolbar. If the score is created for the first time, a dialog with score generation options will be shown. After configuring the score options, click Apply and then Run.
MPS will compile a LilyPond file of the piece. The Elysium Eclipse plug-in will take care of compiling this file to a corresponding PDF and MIDI file. Note that LilyPond must be installed to use this feature as described in section LilyPond Installation.
The score resulting from the example looks like this:

Options to configure the score generation process are documented here.
To perform musical analyses, select a file or folder to analyze and click the button ![]() in the toolbar. If a file or folder is analyzed for the first time, a dialog with several analysis options opens. Either leave the configuration as it is or make adjustments as required, then click Apply and Run.
in the toolbar. If a file or folder is analyzed for the first time, a dialog with several analysis options opens. Either leave the configuration as it is or make adjustments as required, then click Apply and Run.
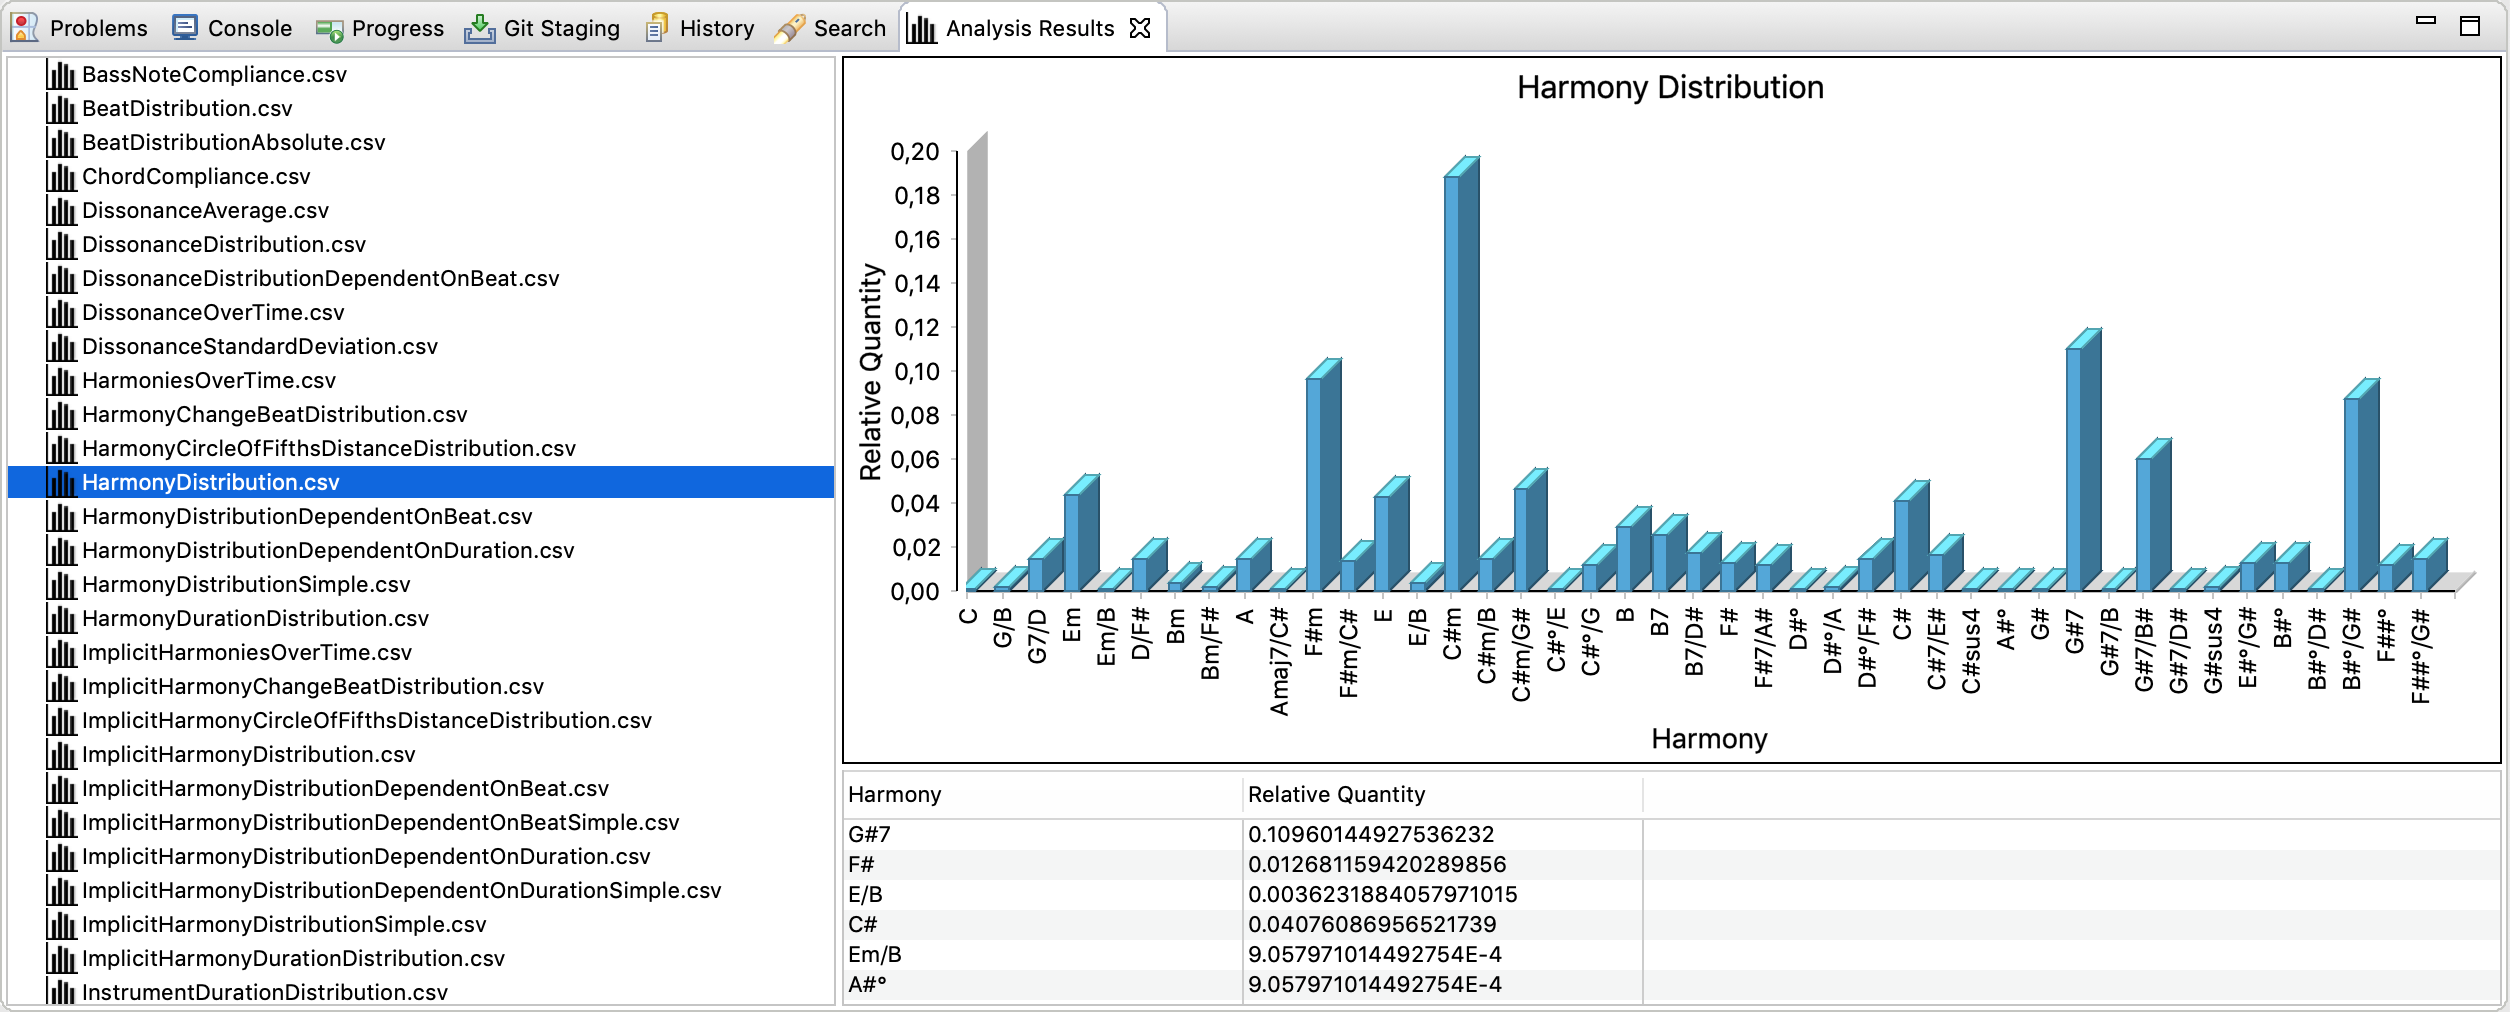
A new folder containing analysis results will be created next to the selected input resource. A number of CSV files and DOT graph files will be created in that folder. To explore and visualize the results, MPS provides a dedicated view, which can be opened by right-clicking the created analysis folder and selecting Open Analysis View:
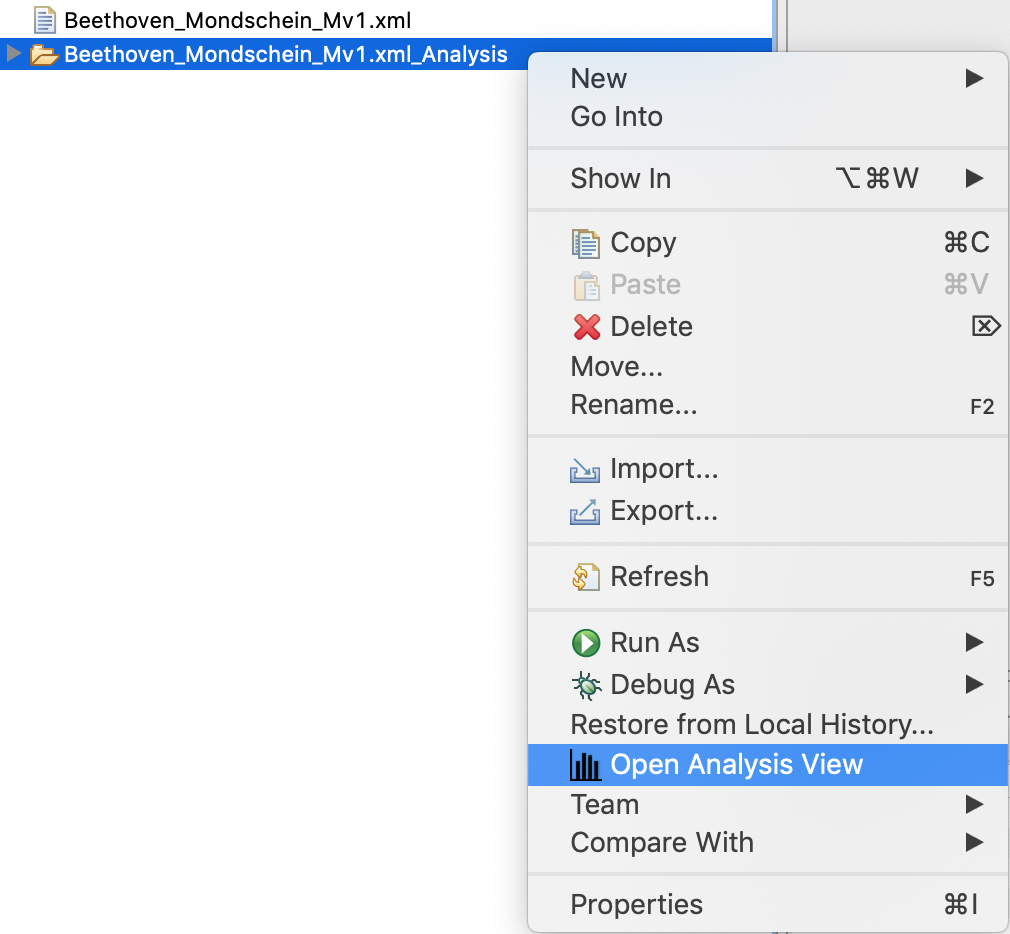
The view is populated with data whenever a folder containing analysis results is selected.
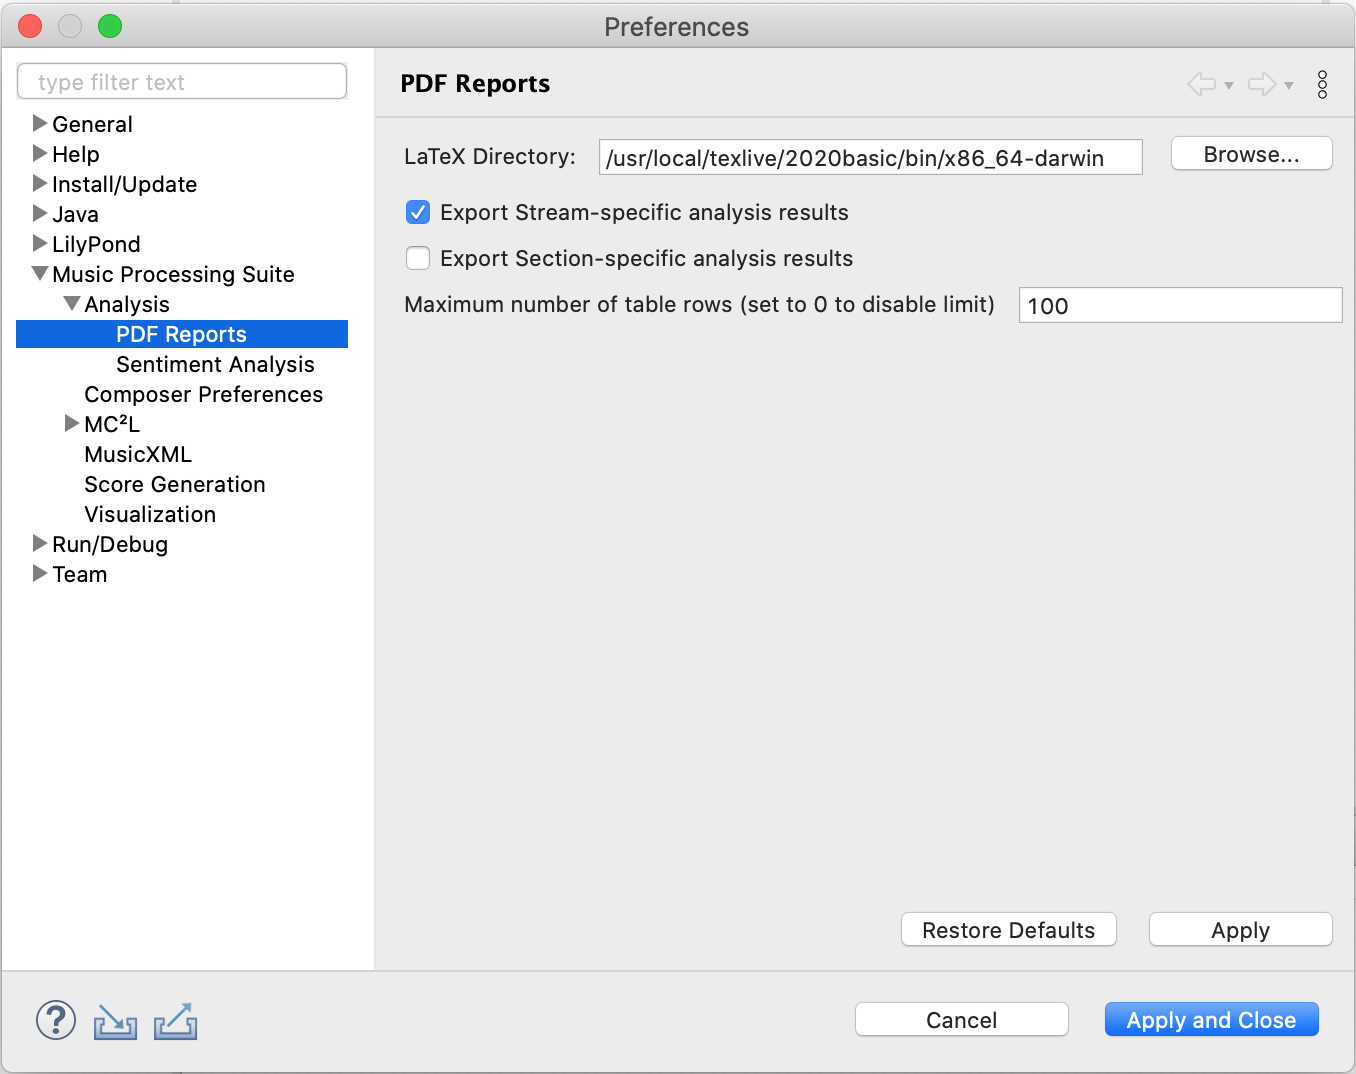
To create a nice PDF report visualizing the data, select the analysis output folder and click the button ![]() in the toolbar. This will create a LaTeX file which will be compiled to a PDF file if a LaTeX environment is installed and configured as explained in section LaTeX Installation. The PDF file will contain statistical plots, diagrams and progression graphs. For a harmonic progression graph example, refer to section Analysis.
in the toolbar. This will create a LaTeX file which will be compiled to a PDF file if a LaTeX environment is installed and configured as explained in section LaTeX Installation. The PDF file will contain statistical plots, diagrams and progression graphs. For a harmonic progression graph example, refer to section Analysis.
Options for analysis report generation are available here:
| Previous | Top | Next |
| Installation | Context Layer Models |